
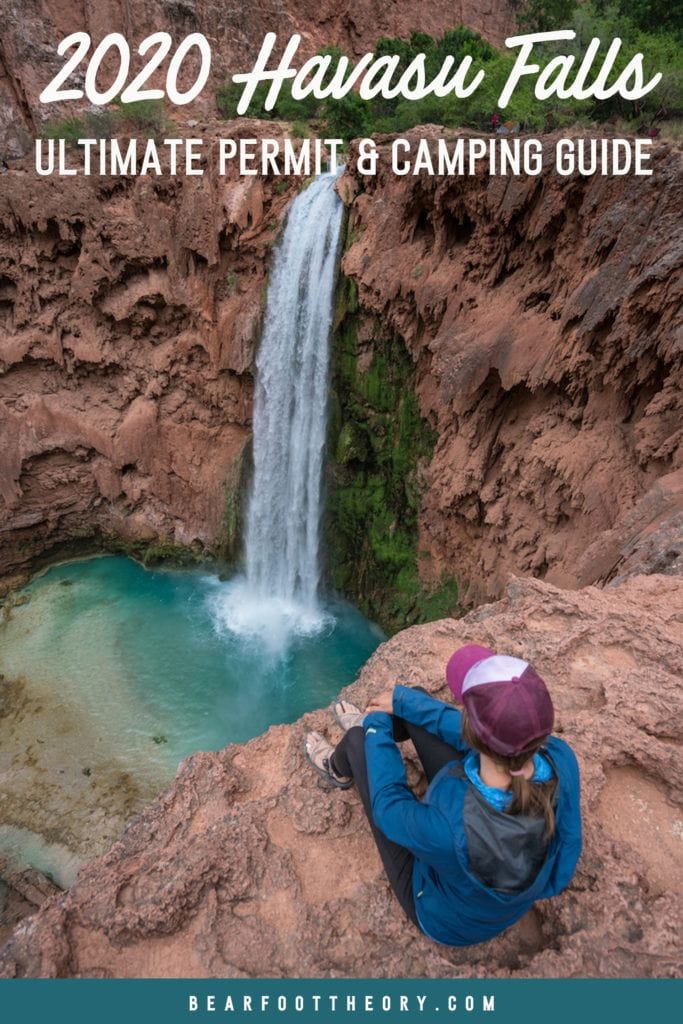
Havasupai is one of the most special places I have ever visited. I’ve been twice now and both times I was MIND. BLOWN. Before my first visit, I’d seen photos of the milky turquoise blue waters of Havasu Falls and I knew it was going to be special, but I didn’t realize how incredibly magical this place is. It’s truly a once-in-a-lifetime experience.
If Havasu Falls is on your bucket list, there are some important things to know before you go. First, you MUST have a permit PRIOR to your visit. Permits are not given out on-site and there is no day hiking allowed. Permits are also very competitive and in most years, they sell out the day registration opens (which is February 1st for 2023).
To help you get the best chance of securing your Havasupai Falls Permit, this blog post covers everything you need to know including dates, fees, and more. I also highlight some important Havasu Falls camping information so you can get the most out of your time there.
All of this information has been updated with the 2023 reservation process and fees.
Important Reminder: As it goes in all of the destinations we share, please practice good trail etiquette and remember to Leave No Trace. This means packing out all of your garbage (including toilet paper), being respectful to others on busy trails, and following the established rules.
Permit Process for Visiting Havasu Falls
The Havasupai Tribe closed access to the falls in March 2020 due to the pandemic and has not allowed access since. 2023 will be the first year since its closure that guests are allowed to visit the falls.
As I mentioned above, in order to visit Havasupai and Havasu Falls, you MUST obtain a permit before your trip. The permit process helps to preserve the natural beauty of Havasupai and provides the Havasu Tribe with an income.
The biggest obstacle to planning a backpacking trip to Havasu Falls, though, is actually getting a Havasupai permit. In most years, permits sell out for the entire year on the DAY that the reservation lines open.
Reservations for the 2023 season open February 1st at 8:00 AM Arizona Time!
How to get a Havasu permit
Permits for Havasupai are available on a first-come-first-serve basis, which is different than a lottery-based system where everyone has a fair chance of winning a spot.
Your best chance of getting a Havasu Falls reservation, then, is to be online and ready the minute registration is open, which is 8 AM Arizona Time on February 1st, 2023.
Be sure to make an online account at HavasupaiReservations.com anytime before February 1st. Then, on February 1st, log into your account before 8 am Arizona time and be ready to refresh your screen the minute the lines open.
Havasupai permits will likely sell out within a few hours (or less since people haven’t been able to visit since 2020).
Havasupai Permit FAQs
How many people can be on my reservation?
You can have up to 12 people on your Havasu Falls camping reservation. However, there is only ONE name on each reservation and that person MUST be present with a valid photo ID at the time of check-in.
How many days can I get a permit for?
All 2023 permits are for 4 days and 3 nights. You can choose to do a shorter trip, but you will pay the same permit fee price.
Can permits be transferred?
Yes, but only to someone on your Potential Alternate Trip Leader list (which can include up to ten names). You can transfer all or part of your permit reservation via the official Transfer System at HavasupaiReservations.com
Are permits refundable?
Permits are not refundable or changeable but can be transferred to someone on your PATL list if you can’t make your trip dates.
You can ‘sell’ your permit via the official transfer system located on the Havasupai Reservations website.
How much does a Havasu permit cost?
A permit for 3 nights is $395 per person.
Native American discounts are honored at check-in with a valid reservation and identification.
Can I go without a permit? Is day hiking allowed?
No. Per the official Havasupai Tribe website, all visits to Havasupai and Havasu Falls require a reservation made PRIOR to arrival. No day hiking from Hualapai Hilltop is allowed and even if it was, the falls are much too far to hike there and back in one day.
Tips for obtaining a Havasu permit
Getting a Havasu camping permit is very competitive, so to increase your chances, follow these tips:
- Create your online account before February 1st. You don’t want to waste precious time creating your account the day reservations open.
- Have flexible dates. Mid-summer is when everyone is on summer vacation, so it’s also going to be the most competitive time. If you can go mid-week in March or late November, then you’ll have a better chance of getting a permit.
- Remember that Arizona doesn’t do daylight savings time. Double-check what that means for your time zone. It would be a bummer to log in an hour late!
- Create your Potential Alternate Trip Leader (PATL) list in advance. A PATL is the ONLY person your permit will go to if you can’t make your trip. If you don’t designate a PATL, you risk forfeiting the trip for everyone in your group. You can choose up to 10 Potential Alternate Trip Leaders.
Pack mule reservations
If you would like your gear carried in by a pack mule, you can add your name to a waitlist after you’ve secured your campground reservation. You’ll be notified if the Tourism Board has approved your Pack Mule request.
What if you didn’t get a permit?
If you don’t score a permit before they sell out for the year, you may still be in luck. The online Havasupai Reservation System has a Cancellation/Transfers Page where you can purchase canceled trips.
If there are dates that work for you, but the permit includes more spots than you need, you can sell those extra spots on the official transfer system after you purchase the canceled trip.
This list is updated daily at 8am Arizona Time.
Where is Havasu Falls / Getting to the Havasu Falls Trailhead
The Havasu Falls trailhead is located at Hualapai Hilltop which is marked on the map below. The two closest airports to Havasu Falls are Las Vegas (4 hours) or Phoenix (5 hours).
Directions to Havasu Falls from Las Vegas
From Las Vegas, take the 93 South towards Kingman, Arizona and then head east on Route 66. After 57 miles, turn left on Indian Road 18. Drive for 60 miles until you reach the end of the road. There is a large parking lot with bathrooms at the trailhead. There is also a place to camp just below the bathrooms, but there is no water available at the trailhead. Peach Springs, Arizona is the nearest place to the trailhead with basic services like gas, food, and water.
Hualapai Hilltop, the trailhead for Havasupai and Havasu Falls
The Best Time to Visit Havasu Falls
The best time to visit Havasu Falls depends on what you want to do there. Do you want to swim? Or do you want to avoid crowds? Here are the pros and cons of visiting Havasu Falls for the different seasons.
Spring/Late Fall
- Pros: Less bugs and less people
- Cons: Variable weather could mean less than ideal swimming temps. One year I went in March and had swimming weather (80 degrees) during the day and very cold nights (40 degrees). On my most recent trip in May, it rained and was not suitable for swimming until the last day. The plus side of this is that the hike out (which can be unbearably hot) was very tolerable.
Summer/Early Fall
- Pros: Hot weather means you can sit and hang out in the water all day
- Cons: Hot temps mean hiking could be miserable. In the heat of summer, when Havasu Falls is the busiest, people get up at 4am to begin the hike out. Summer is also monsoon season with flash floods being most likely from mid June to late September.
How to Prepare For Your Havasu Falls Camping Trip
If you’re lucky enough to nab a permit, you’ll need to do some planning since the Havasupai Indian Reservation and Havasu Falls are quite remote and you need to carry in and out all of your supplies.
Here are a few tips to help you plan your Havasu Falls camping trip:
1. Have everyone in your group make an online account
While only one name is on the camping reservation, all members of the group must make an account at havasupaireservations.com and confirm that they have read and understood the Havasupai Rules and Laws.
A summary of these Rules and Laws includes:
- NO cliff jumping
- NO rock climbing
- NO littering
- NO amplified music
- NO feeding animals
- NO fishing
- NO kayaks, standup paddleboards, pool floats, or other watercraft
- NO alcohol/drugs/smoking (including marijuana)
- NO fires (aside from gas cooking canisters)
- NO drones
- NO nudity or inappropriate clothing
- NO photos allowed in the village or of Havasupai tribes members
You can read the complete list of rules here. There are fines ranging from $200 to $5000 if you get caught doing any of these things or even jail time. Please be a kind visitor and don’t break these rules, ruining it for everyone.
2. Plan your itinerary
Each Havasu Falls camping reservation is for 4 days and 3 nights. It’s best to plan on being at or near the trailhead before your permitted day so you can get an early start on the 10-mile hike to the Havasupai campground.
Here is a suggested itinerary:
Day 0: Arrive in the area
You want to arrive near the Hilltop Trailhead parking area the day before you start your hike to Havasupai Campground. There is no tent camping allowed at the parking area, but visitors have reported sleeping in their vehicles. Water is not available in the parking area, but there are bathrooms.
Other options for accommodations include:
- Closest Cities with Hotels
- Peach Springs (68 miles/1 hour 20 minutes from trailhead)
- Seligman (90 miles/1 hour 40 minutes from trailhead)
- Kingman (118 miles/2 hours from trailhead)
- Closest Campgrounds
- Grand Canyon Caverns RV Park and Inn in Peach Springs
- KOA in Seligman
- Kingman has a number of camping options
Day 1: Hike to Havasupai Campground
On the day of your reservation, make your way to the Hilltop Trailhead parking area with a full tank of gas. The closest gas station is 70 miles away. After parking in the visitor’s area, display your Campground Reservation Confirmation Code visibly on your dashboard.
At the trailhead, you can organize your gear and get ready for your 10-mile hike.
It is 8 miles to the village of Supai where you’ll check in at the Tourist Office. You’ll receive a wristband that you must wear throughout the duration of your visit as well as a tag for each of your tents, which will be checked daily by a ranger who patrols the campground.
After you’ve checked in, you can continue on the last two miles to the campground.
The next section has more detailed information on what to expect on the trail to Havasupai Campground.
Days 2 & 3: Explore!
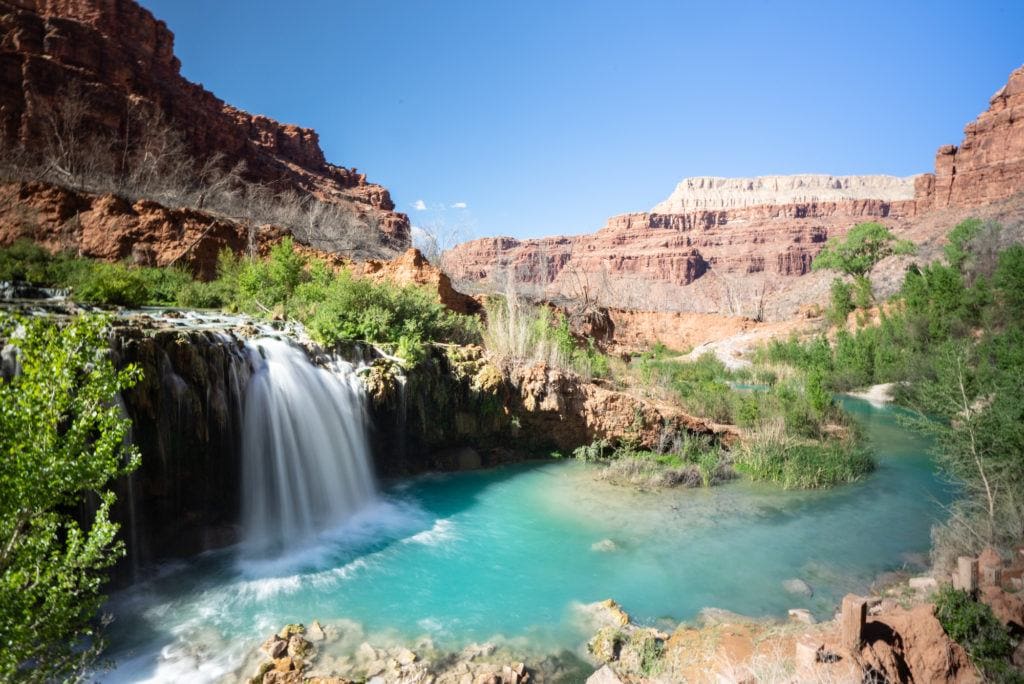
Havasupai has five waterfalls you can visit. The two lower falls include Havasu Falls (the most famous one), Mooney, and Beaver. The upper falls include Fiftyfoot and Little Navajo Falls.
Spend your days exploring these falls (remember, no climbing or jumping) and relaxing in this beautiful spot.
Day 4: Hike back out to the Havasu Falls Trailhead
On your final day, pack up camp and start your 10-mile hike back to the trailhead. If you are visiting in the summer, you’ll want to get a very early start (like 4am) or wait until the late afternoon to beat the heat.
3. Organize your camping gear and supplies
For your 4-day 3 night trip to Havasupai, you need to pack in AND OUT all of your gear and supplies. This includes food, supplies, trash, and camping gear. Water is available at the campground.
There is a small store in the village of Supai where you can get basic snacks and drinks, but don’t rely on supplies here.
For a complete list of what to bring on your Havasu trip, head over to our Havasu Falls Packing List.
Havasupai Hiking Trail Guides
Hiking to Havasupai Campground
- Distance: 10 miles one way (8 miles to the village of Supai)
- Difficulty: Moderate-Hard
- Elevation change: -2,400 feet
- Time needed: 4-6 hours
 Elevation profile courtesy of RockHounds.com
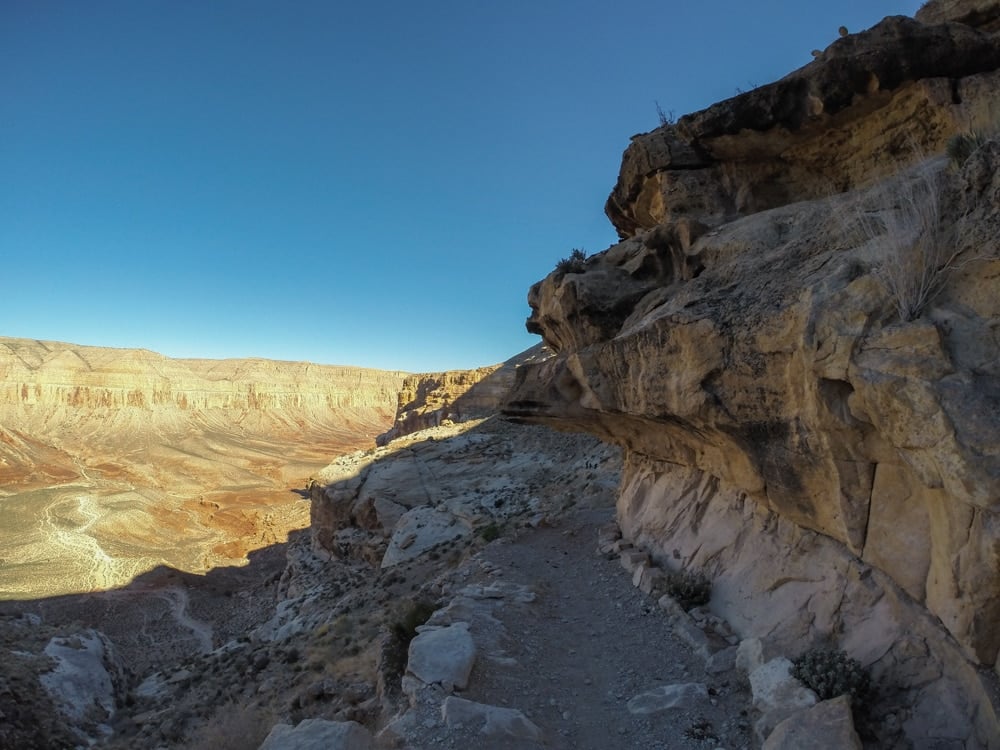
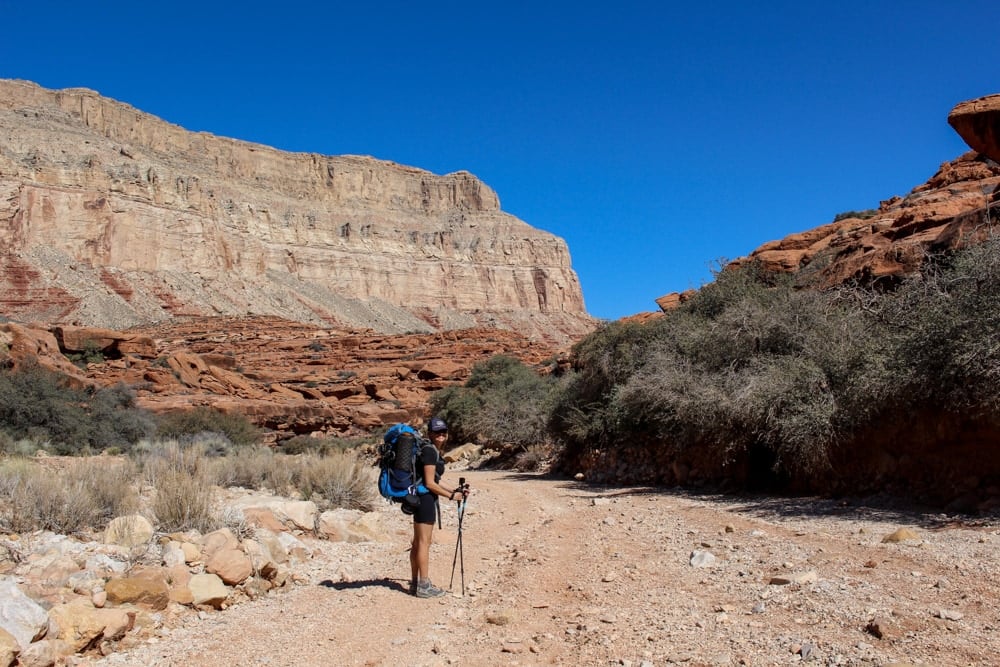
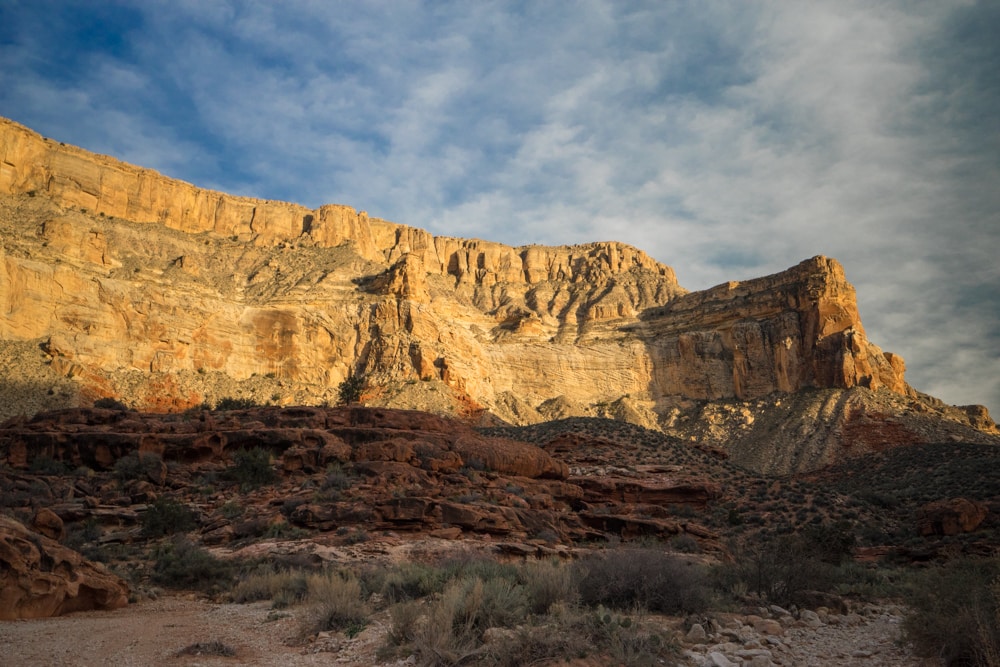
The total distance to the Havasu Falls campground is approximately 10 miles one way (20 miles round trip) and the trail begins at the Hualapai Hilltop parking lot at an elevation of 5,200 feet. Immediately, the trail begins a 1,000 foot descent over the first mile, dropping you into Havasu Canyon. Once you reach the wash, the trail follows the dry river bed for the next 6.5 miles, gradually dropping another 1,000 or so feet until you reach the village of Supai at mile 8.
The hike on the way in is long but not too difficult, and the initial descent is on a well-maintained series of switchbacks. Once you are in the dry river bed, the hiking can be a bit slow due to the sandy gravel, but the trail is very easy to follow. If any point you think you’ve lost the trail, just keep following the river bed until you meet back up with the path. Note there is no water available on the trail, so make sure you pack enough to make it to the campground.
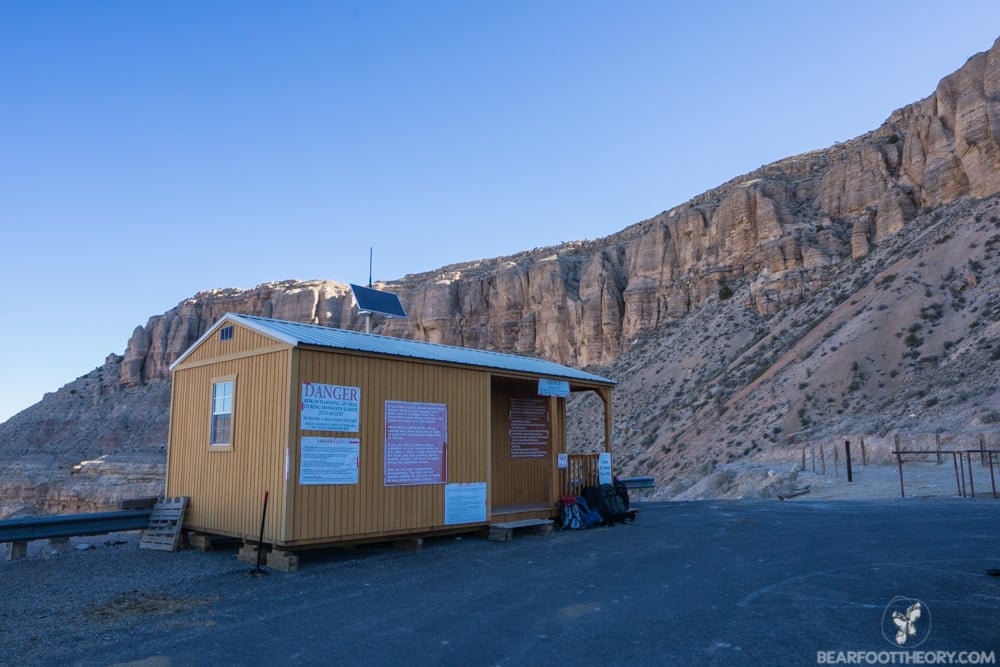
When you reach the Supai Village, your first stop will be the Havasu Falls Campground office. Stop here to check in and get your wristbands.
Once you pass through the Supai village, it’s another 2 miles and a couple hundred of feet down to the Havasu Falls campground.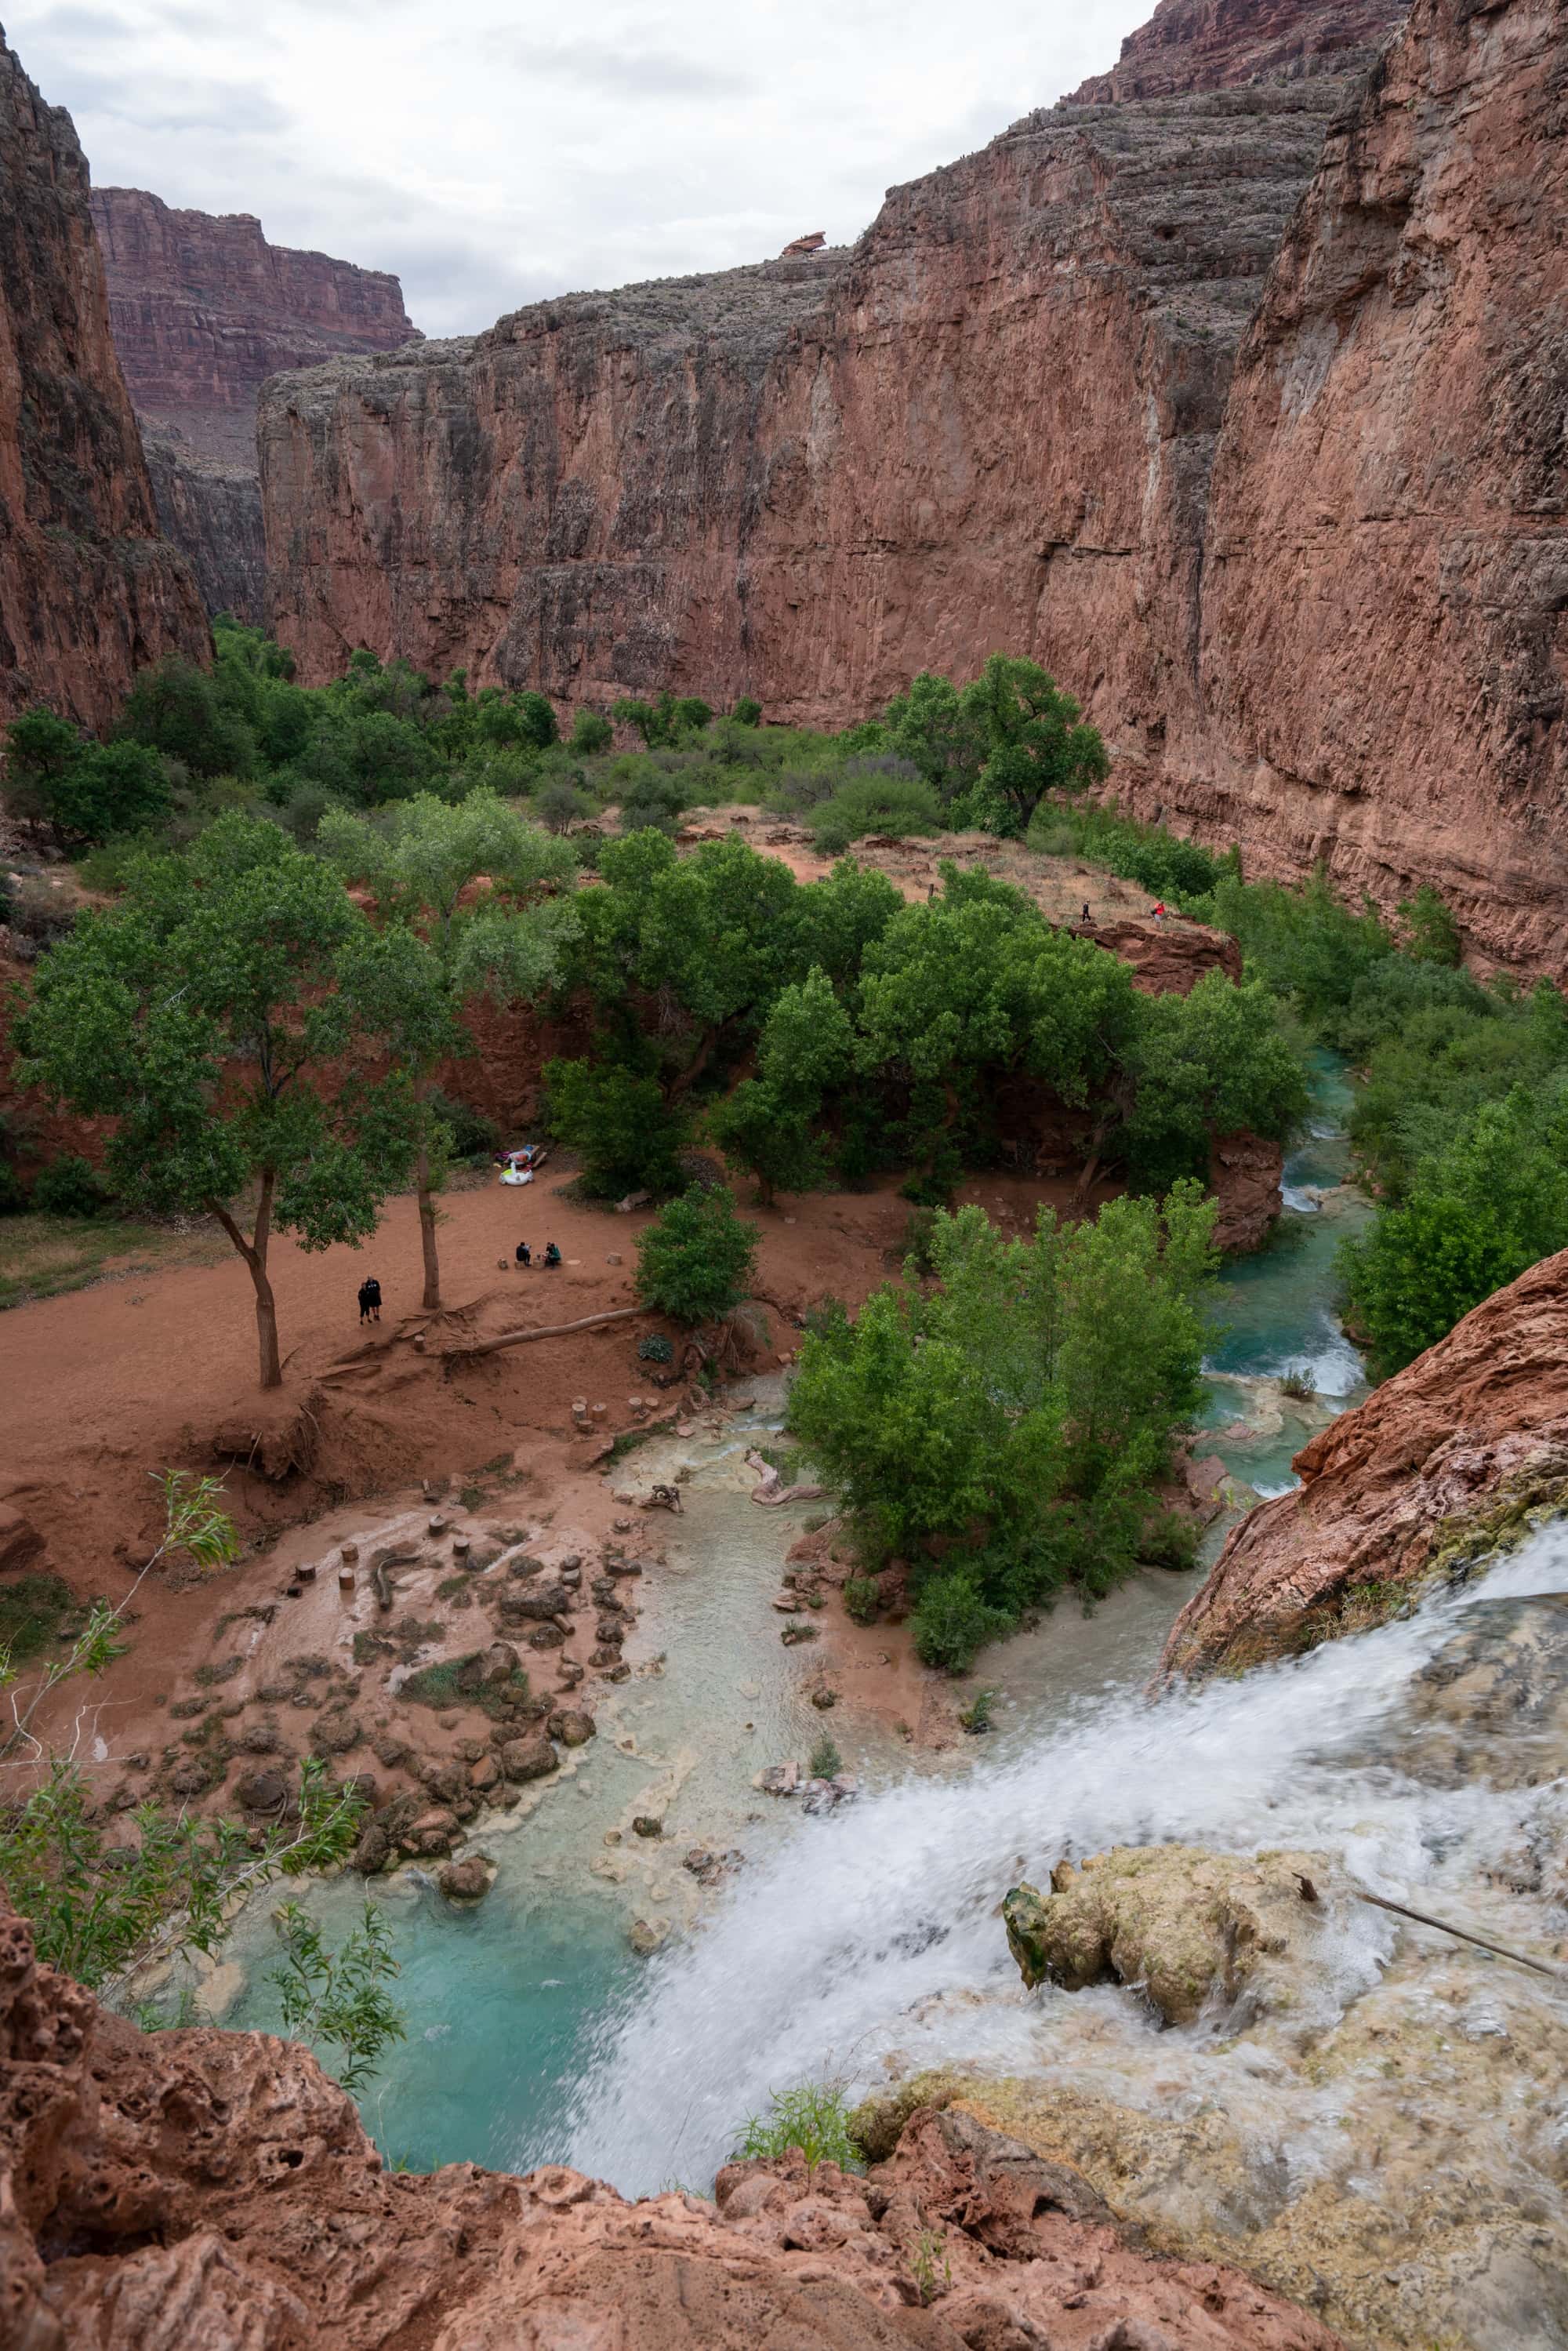
Camping is not allowed at the base of Havasu Falls. The campground begins just a few minutes further down the trail after passing through a fence.
Hiking to Mooney and Beaver Falls

I absolutely recommend hiking down to Mooney Falls at a minimum. The hike down is challenging, steep, and requires use of chains for support. Take your time, and don’t feel rushed by other people. You’ll be proud of yourself when you get to the bottom, and in my opinion, going down is scarier than going back up.
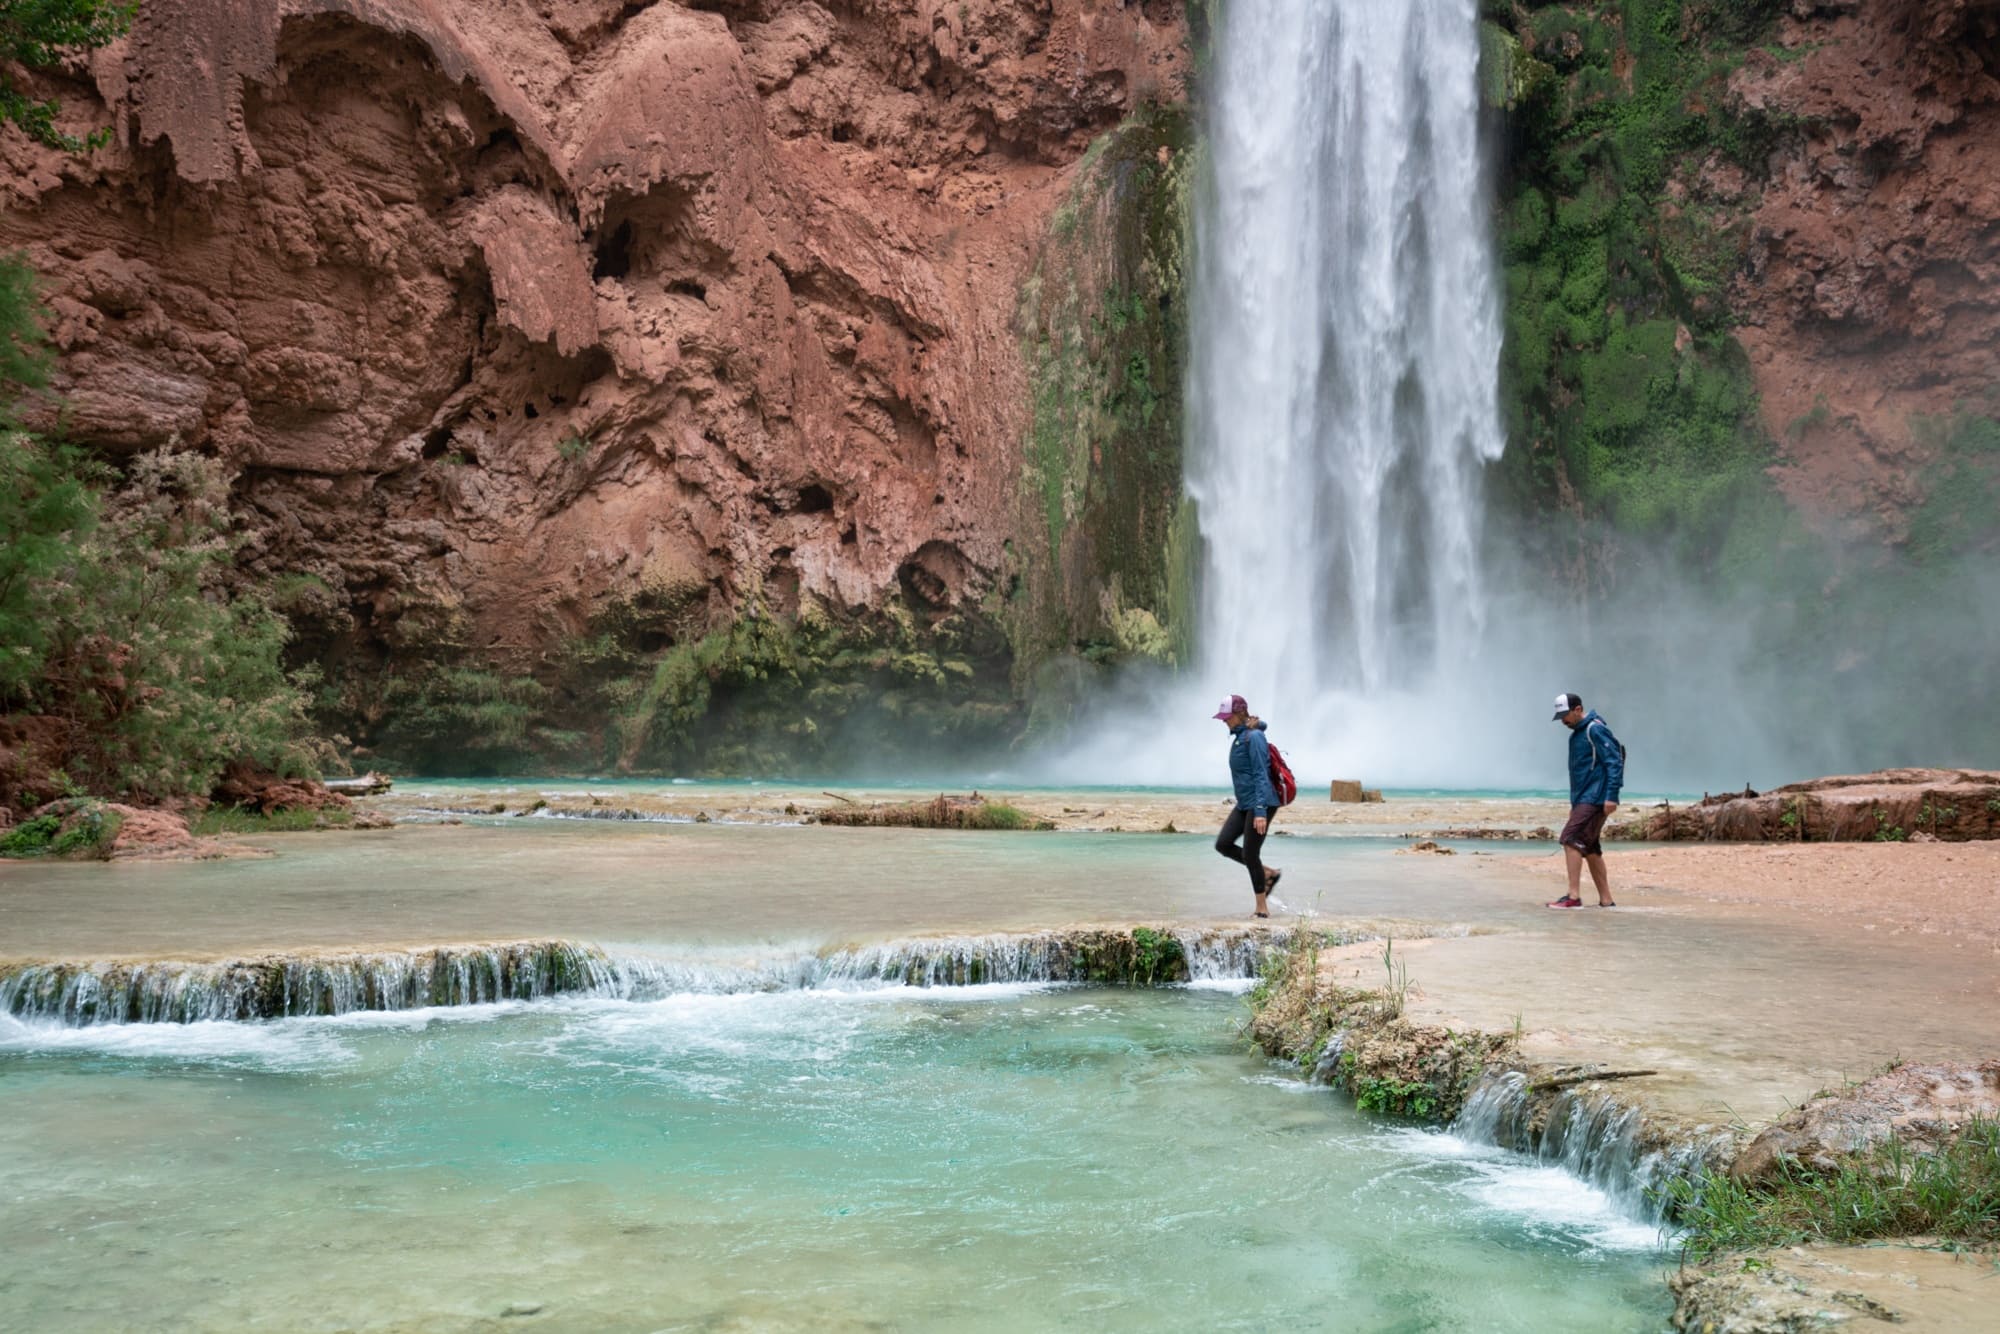
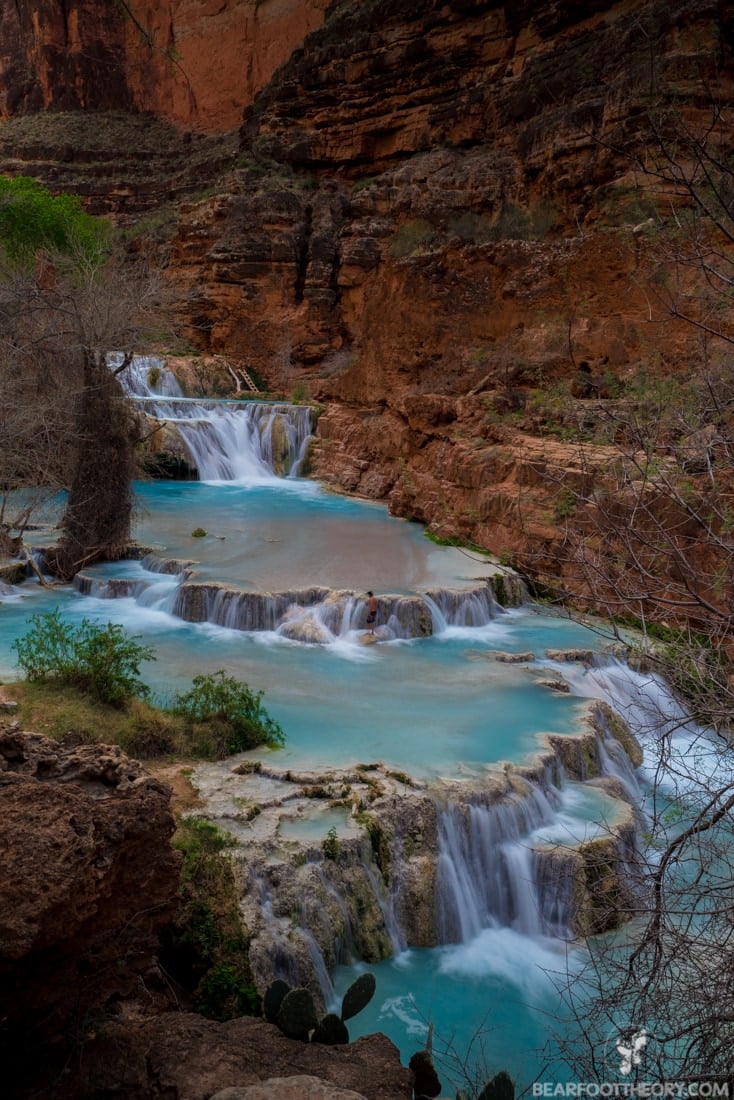
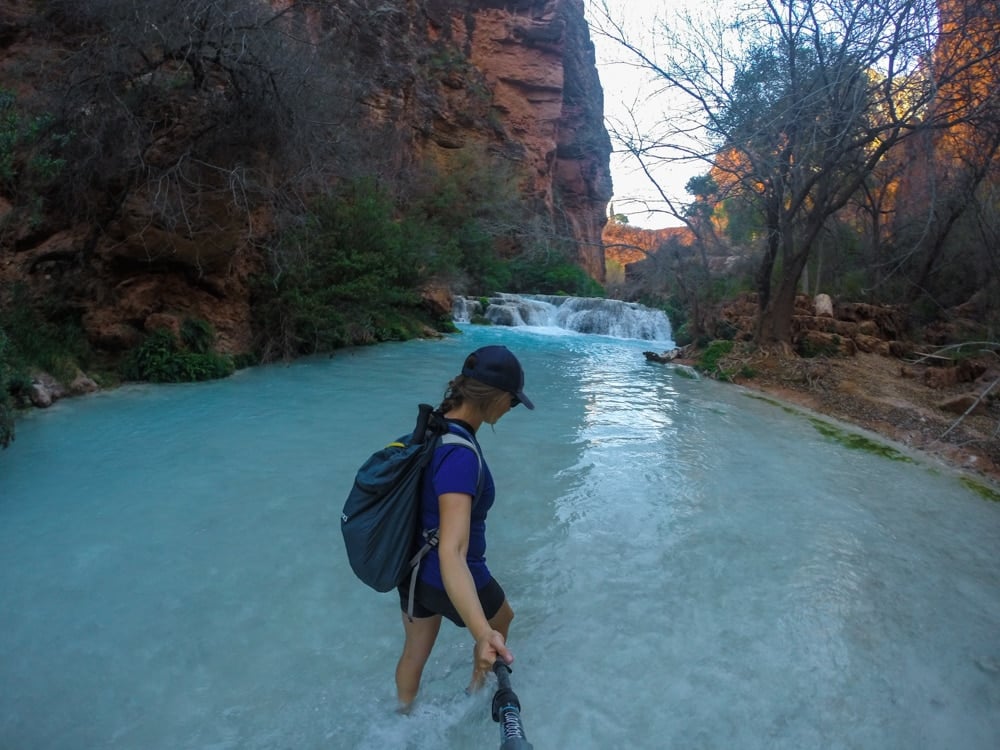
Once you’re down there, the trail to Beaver Falls is stunning with way fewer people than you’ll find around Havasu Falls. Pay attention to the trail since it crosses the river a number of times. With a leisurely pace, the hike to Beaver Falls takes about 5 hours round trip. It has a few steep sections but is fairly flat for a majority of the hike. You can’t miss Beaver Falls when you arrive. There is a sign and sometimes a ranger present.
Beaver Falls is an amazing place to take a dip. If you want some sun for your Beaver Falls swimming excursion, get there earlier in the day before the sun goes behind the canyon wall.
Hiking Back to the Hualapai Hilltop parking lot
The hike back out to your car is a bit more challenging. By the time you reach the climb at the end, it’s likely that you’ll be a bit tired. Make sure you have plenty of water and snacks for the return.
Also, there is very little shade on the trail, so depending on the time of year, the hike out can be deathly hot. That extreme dry heat can suck the life right out of you, and even in March when the temps were in the mid-80s, it was quite hot hiking out. If you are doing this hike in summer, plan to start the trek out in the very early morning, like 4am early, or stay and swim and hike out in the early evening. Just make sure you have enough batteries for your headlamp in case you get caught in the dark.
If you do decide to stay and enjoy the falls and hike out later in the day, it’s definitely worth a stop at Navajo and Fifty Foot Falls. Both are lovely, and there are also some private areas you can swim in along Havasu Creek.
For more information on all of the different waterfalls in Havasu Canyon, check out this blog post.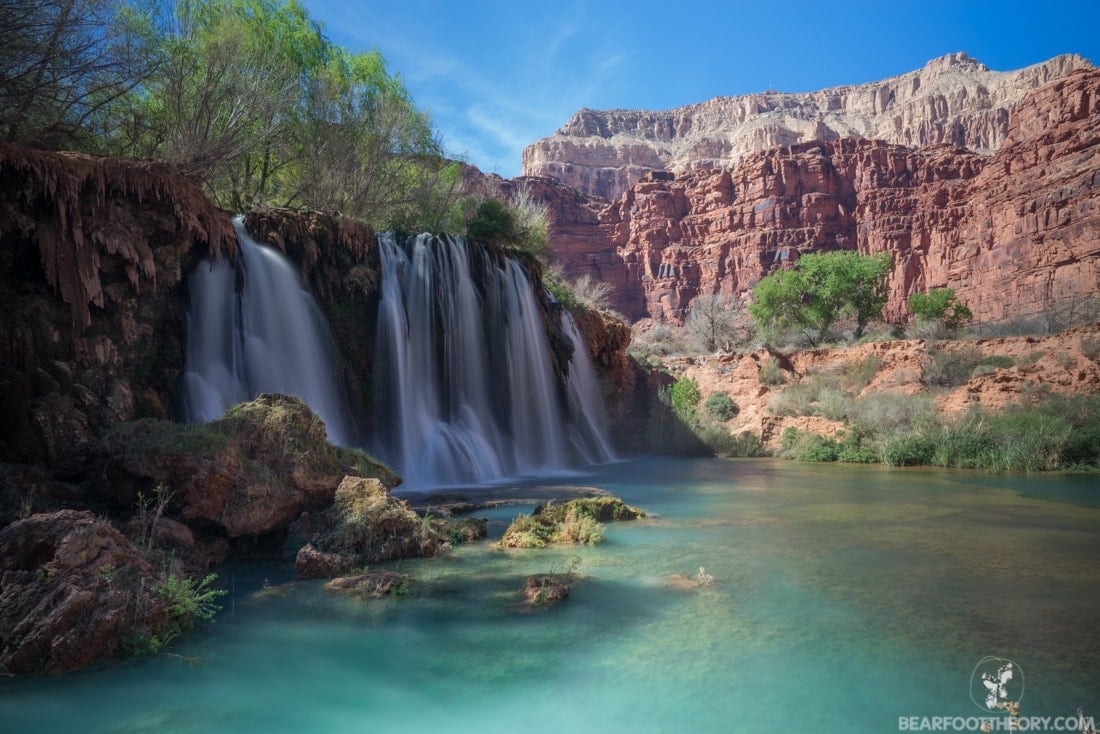
Do take time to enjoy the scenery as you hike. People say that the hike itself isn’t all that exciting, but the colorful canyon walls really are quite beautiful and worthy of some photos.
Havasu Camping
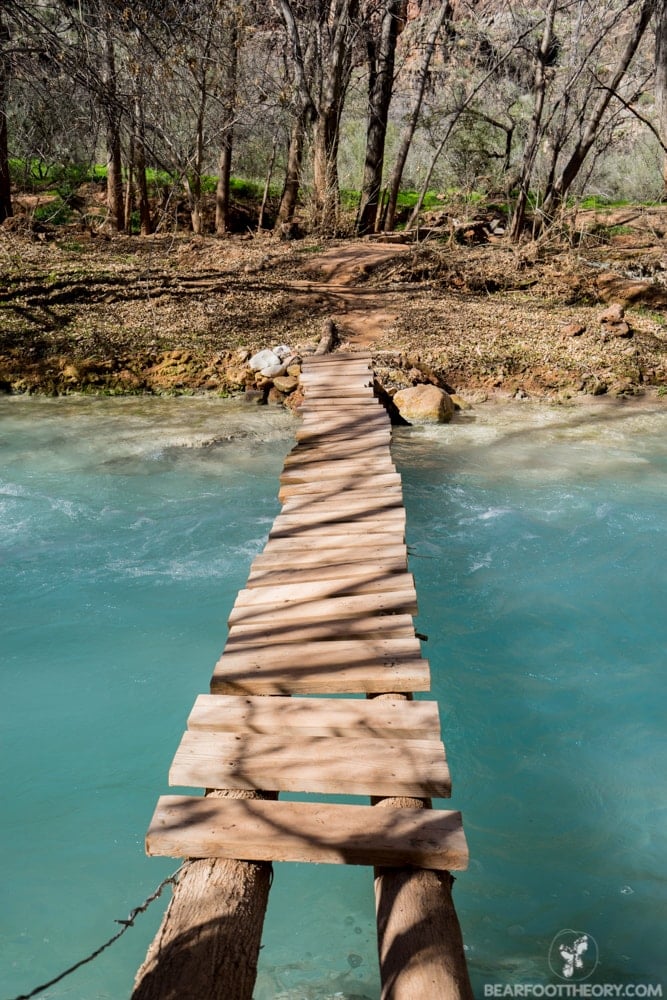
The area for Havasu Falls camping is about a mile long and sits between Havasu Falls and Mooney Falls. Campsites are scattered throughout. A majority of the sites are right on the river that runs through the campground, and most of the sites have a picnic table. Note that there are campsites on both sides of the river with several foot bridges that make for an easy crossing. Campsites are not assigned and are first come-first served. If you are concerned with getting a prime campsite, get an early start from the trailhead.
The crowds seemed thinner the further we walked. The only disadvantage of being near the Mooney Falls end of the campground is that the water spigot where you fill up your water bottles is located near the start of the campground. There are four toilet facilities evenly spaced throughout the campground, and they were surprisingly clean with plenty of toilet paper. There are NO showers, and there are no campfires allowed in the Havasu Falls camping area.
When you are camping it’s important that you:
- Practice Leave No Trace in order to keep the campground and the falls clean for everyone to enjoy.
- Be respectful of other campers and watch your noise at night. It travels fast in the canyon and is an easy way to get on your neighbor’s bad side.
- Use the restrooms rather than going outside your tent.
- Pack out all of your trash and don’t leave your trash in the bathrooms for the campground staff to pick up. All trash left behind must be sent out via helicopter, so it’s much easier if everyone simply does their part to carry everything out that they brought with them.
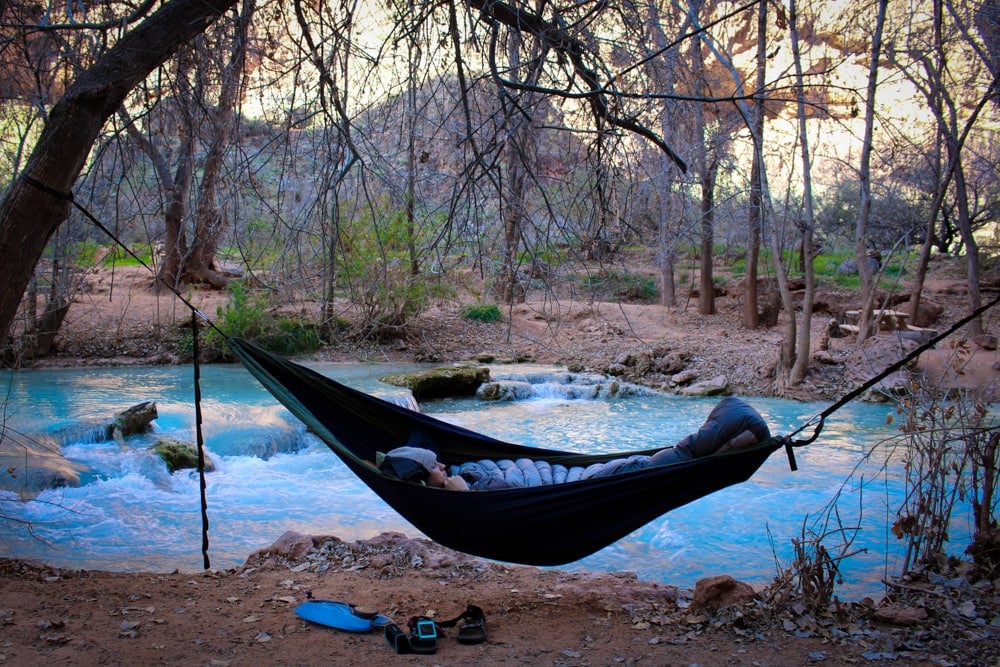
The campground is also hammock heaven, with tons of trees to swing from. I slept in my ENO Hammock for the first time ever on this trip, and I believe there are many more hammock nights in my near future. If there’s a chance of rain, don’t forget to bring a tarp if you plan on sleeping in a hammock.
What Gear to Bring on your Havasu Falls Camping Trip
Packing correctly for your Havasu Falls camping trip is important since you’re backpacking in. To make sure you don’t forget anything, check out our complete packing list for Havasu Falls.
You can also review our standard backpacking gear checklist for 3-day adventures. Don’t forget these few special additional pieces of gear for Havasu Falls:
Water shoes
You’ll definitely want a pair of shoes you can hike through the water with, like a lightweight pair of Tevas or Astral water shoes. When you go swimming it will make entering and exiting the water much easier. Also, they come in handy on the hike to Beaver Falls. On this trail, there is a river crossing and getting your feet wet is unavoidable. I did the entire hike to Beaver Falls in my Tevas, while my friends wore their hiking shoes and took them off for the crossing. Either way works, but having sandals or water shoes makes things more convenient.
Camera Gear
Havasupai is a great place to practice your photography skills. The landscape is diverse and with so many waterfalls, it really is a photographer’s dream. If you want to try and get some of those silky waterfall shots, you will want to bring a tripod. Mefoto makes a sturdy, compact tripod for backpacking that I recommend. If you want something lighter and less expensive, Joby makes some great flexible tripods for trekking.
I shoot with a Sony A7R2, and when there are waterfalls, I always bring a variable neutral density filter to allow for slower shutter speeds even when it’s bright out (make sure you check the thread size on your lens for sizing). For a detailed list of my photography gear, go here.
A GoPro is also awesome for Havasu Falls since the GoPro is waterproof when it’s in its case. Getting fun video footage is super easy with a GoPro as well. I shoot with a GoPro Hero7 Black.
Hydration Bladder & Reservoir
There is a fresh spring in the campground that is tested for contaminants on a monthly basis. On my trip, this is where we filled up, and we didn’t worry about filtering our water. However, there are times when the Camping Office will recommend you filter the water, and for that reason, it’s always good to have a backup plan. Good options include simple purification tablets or the Platypus GravityWorks Water Filtration System (read my full review) which is super lightweight and effortless to use.

Water is NOT available at the trailhead, so make sure you have enough with you for the hike before you drive all the way out to Hualapai Hilltop. This means you should have a way of carrying 3 liters of water for the hike in and out, such as this 3 liter Osprey hydration reservoir. I especially like this bladder because the back side is hard, making it easy to slide in and out of your pack. Multiple water bottles also work, and I’m a big fan of the Platypus Soft Bottles.
Small Daypack
It’s a good idea for someone in your group to have a small daypack that you can use to carry gear on day hikes to the waterfalls. This is especially important if you are planning on going down to the base of Mooney Falls. That trail is slightly treacherous and you are going to want both hands as you make your way down. A small collapsible daypack like the Cotopaxi Luzon will ensure you don’t have to worry about hanging on to your water and camera.
Quick Dry Towel
It’s nice to have something to dry off with when you get out of the water. A simple quick dry towel like the REI Multitowel Lite takes up little room in your pack.
Bug Spray
The bugs were nonexistent when we were there in March, but we were told by the ranger that once the trees start to bloom, they come out in full force and bug spray is necessary.
Sunscreen
The sun is crazy intense out there in the desert, so don’t forget some waterproof sunscreen.
Other Tips for Camping at Havasu Falls
- Watch out for marmots. They are sneaky and will get into your food if its left out where they can get to it. When you leave your camp to go for a swim or a hike, make sure to hang it or stash it away.
- There are options to use pack horses or helicopters to transport you and your stuff. I say challenge yourself and get yourself down there with all of your gear on your own two feet. It’s cheaper and a better workout. Plus, we noticed people who seemed to be waiting quite a long time for their stuff to arrive. If you are set on getting assistance, check out the official Havasupai Tribe website for info or inquire with the camping office about your options.
- Make sure to check out my Havasu Falls Gear List and my blog post with Havasu Falls Dos and Don’ts
Do you have any other questions about visiting Havasu Falls? Leave a comment below!
Source link