
*FOR THE NON-TECHNICAL:
A few things first. This is easy, you can do it. I just want to define some terms for you.
Domain: Is basically the name of the website. In your email, the domain name is everything that comes after the “@” symbol.
URL: Universal Resource Locator. Everything you type in to get to the actual domain or the specific pages within the domain.
google.com would be a domain. would be the URL.
If I wanted to go to Gmail, google.com is still the domain. The URL would be If you type in the URL it will actually take you to the google domain.
So when I say “custom website domain” I mean a website that is found by typing whatever you decide should be typed (assuming availability) into the browser address bar. For a résumé, I am assuming this would be your name.
A couple years ago I created a web page where I attempted to expand beyond what I put into my traditional résumé. I am not a designer so it isn’t pretty, but JoshuaRender.com was born.
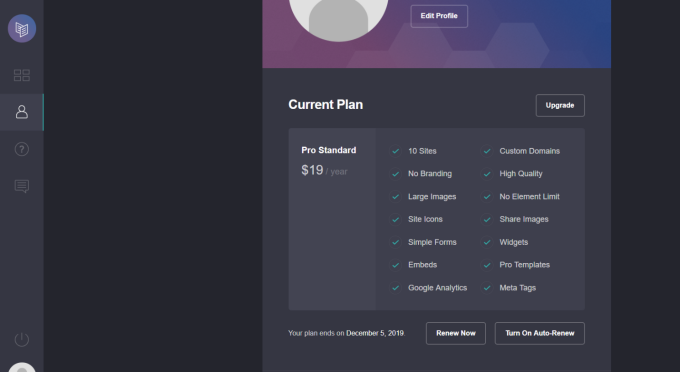
It didn’t start out as my customized domain resume, nor did I really set out to create a résumé using my own name as the URL. I stumbled upon a free service that let you create simple web pages. It would put them on the Internet using a random URL from its own web domain. For $19 a year they had a premium option that, among other things, allowed you to use whatever domain name you wanted.
If you would like the free version and random URL to get to your résumé, just navigate your browser to an account, follow the instructions, and use the drag and drop tools to build your web page. That’s all you need to do.
Creating Your Web Résumé With Customized Domain
1. Navigate to
Create an account. You will start with the free site. The URL will be a series of letters and numbers using their domain. To use a custom domain with this site you have to subscribe to the paid version. It costs $19 a year.
2. Getting A Custom Domain
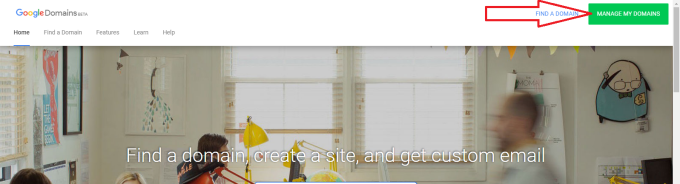
You don’t actually buy a domain. You lease it. You can lease it for several at a time or you can lease it yearly. The easiest way to do this is to go to a company that deals with domain registration. I tend to use Google Domains now and for this tutorial that is who I will be using.
Click on the link to Google Domains or type the URL into your web browser:
To buy a domain it can cost from $12 a year to a lot more than $12. Using a simple “.com” and you should be okay on the price, but your chosen name must be available. So the first thing you do is conduct a search for a domain to ensure availability.

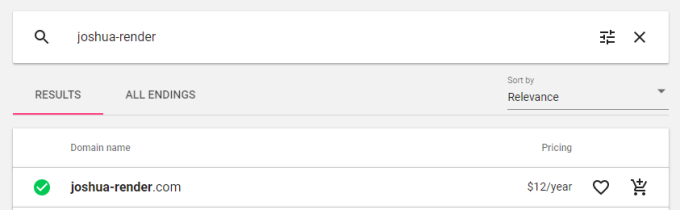
Once you find one that is available, it is as simple as paying for it and providing things like your name and address for domain registration purposes. You can choose to lease the domain for greater than one year during the checkout process.
3. Link Your Custom Domain to Your Web Page
This is the most technical part. If it doesn’t work right away, don’t get frustrated. It can take a couple of hours to go into effect. You won’t likely be able to navigate to your new résumé right after linking the domain and your carrd.co web page.
Go back to the account you created on carrd.co. You need to have built a site for this to work. You need to select “Use my own Domain” under the save feature from within the site editing section. There will be a spot for you to type in your domain name. So if your domain is “joshuarender.com” I would type “joshuarender.com” in that field.
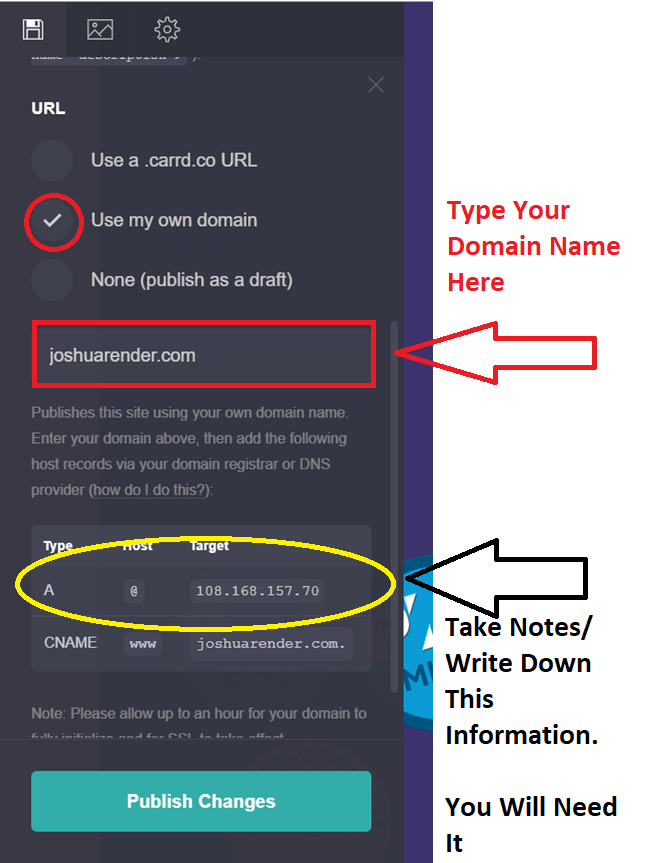
Your “CNAME” should just be your domain name. You need to take note of the target IP address for the “A” row and the Target for the “CNAME” row. In the image, the IP address is “108.168.157.70”.
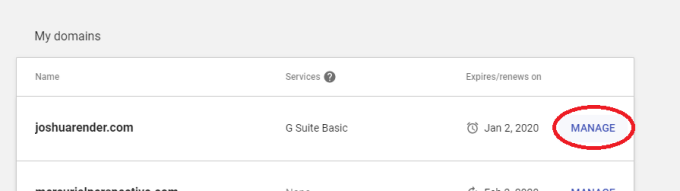
Now you need to go back to . Click the big button on the top-right that says “Manage My Domains”.
That will take you to a screen where all of the domains you have leased can be managed.

Find your new custom domain and then click the “Manage” button next to it.
To link your carrd.co web page to your new domain, click the “DNS” button on the next screen.

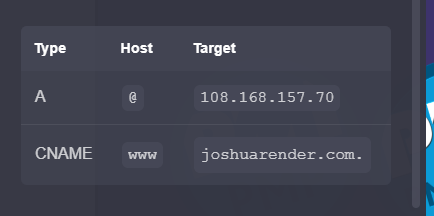
Once on the DNS page, scroll down to the Custom Resource Records section.
The notes you took earlier for “CNAME” and “A” target addresses, you will use those here. Add entries in to look like mine below in the image – just substitute your domain name and your IP address from the carrd.co site. Your IP address from carrd.co may be the same as mine as they host a group of sites on the same servers.

For each entry, click “ADD” ensuring it matches the information you noted earlier.

The “A” row target number and the “CNAME” target is required
And that is all. Within a couple of hours, you should be able to navigate to your new website using a custom domain name.
Source link